Internet Debris

A collection by Neal McKenna
McKenna Ink Thesis Editing Service
To add your comments,
click here.
NOTHING posted here is mine!
Internet Debris does not claim rights
to any of the photos or media content posted to the site.
No copyright infringement is intended.
A collection by Neal McKenna
McKenna Ink Thesis Editing Service
To add your comments,
click here.
NOTHING posted here is mine!
Internet Debris does not claim rights
to any of the photos or media content posted to the site.
No copyright infringement is intended.
A collection by Neal McKenna
McKenna Ink Thesis Editing Service
To add your comments,
click here.
NOTHING posted here is mine!
Internet Debris does not claim rights
to any of the photos or media content posted to the site.
No copyright infringement is intended.

Image via George Takei
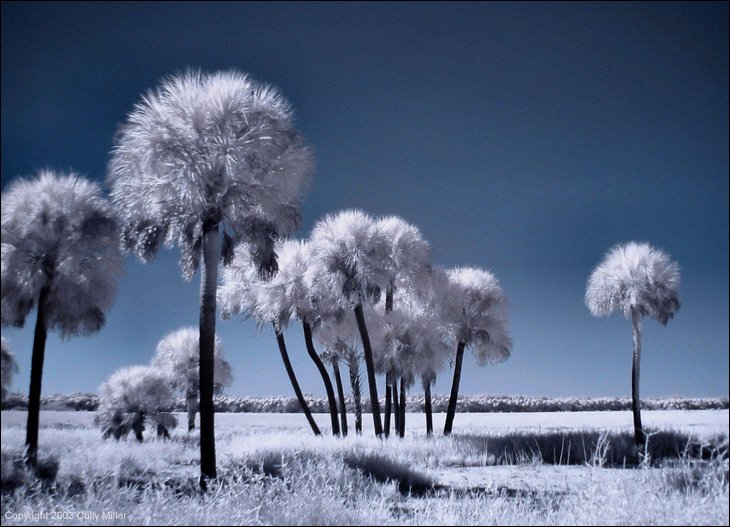
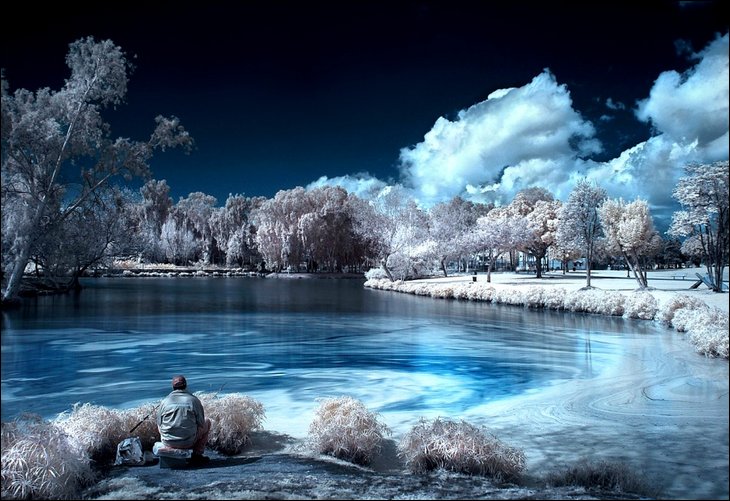
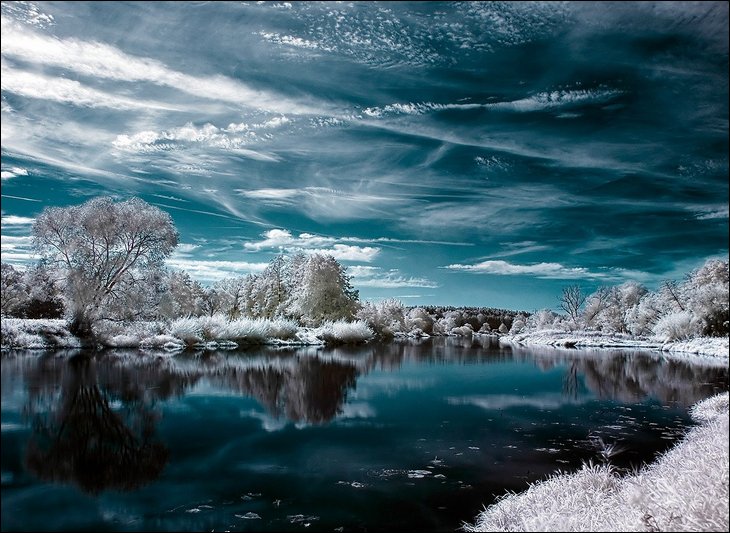
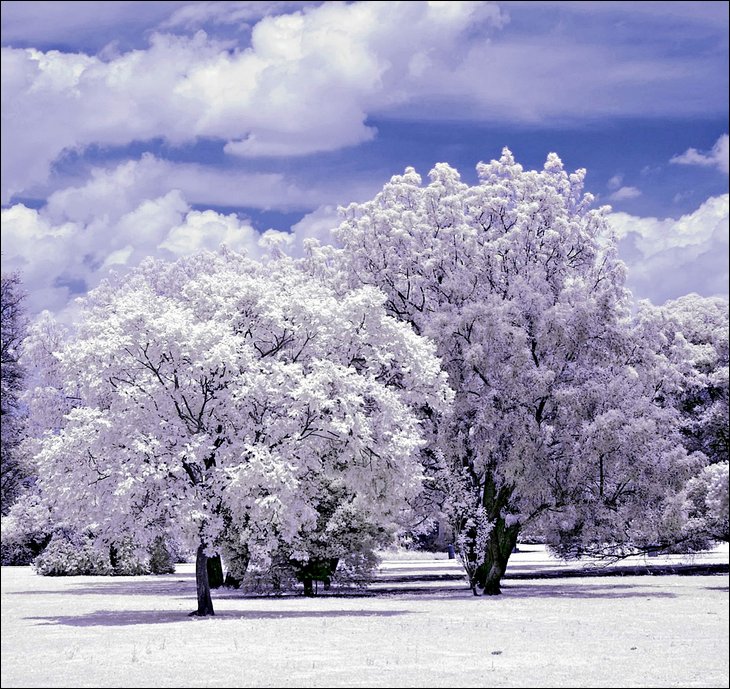
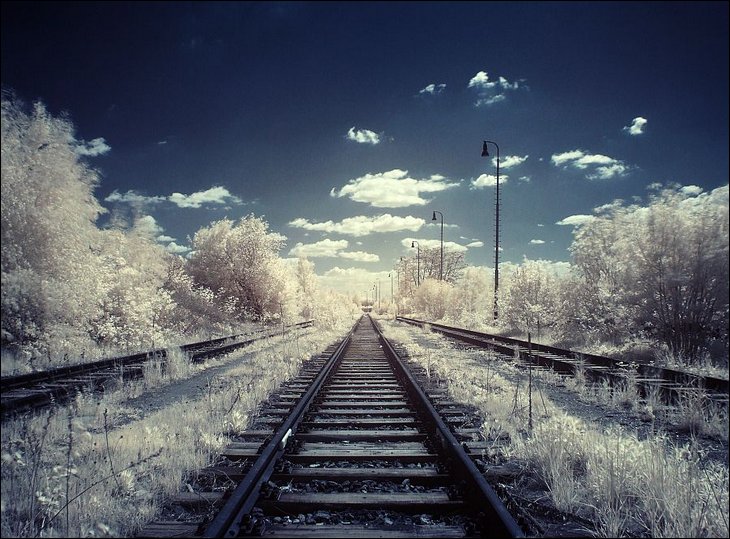
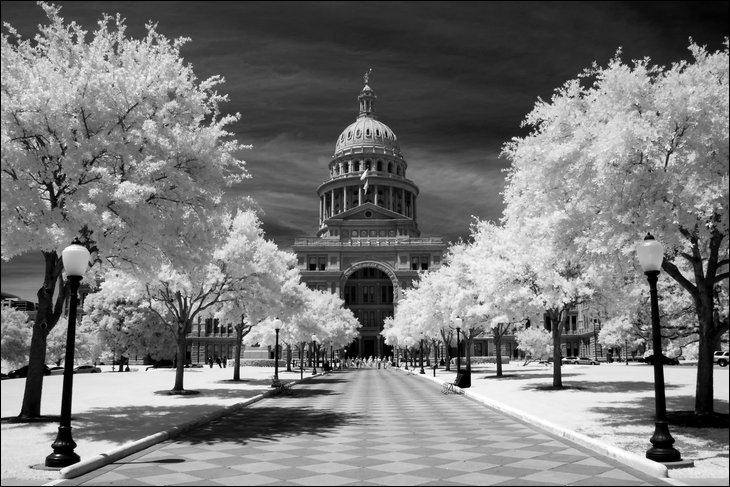
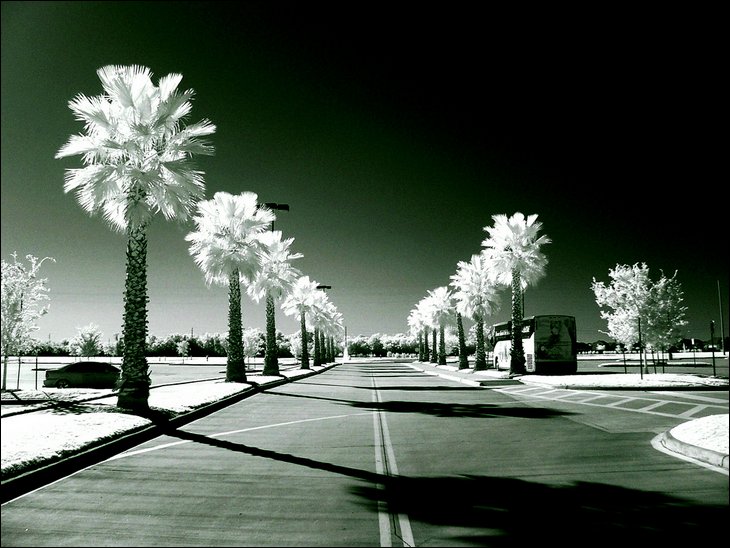
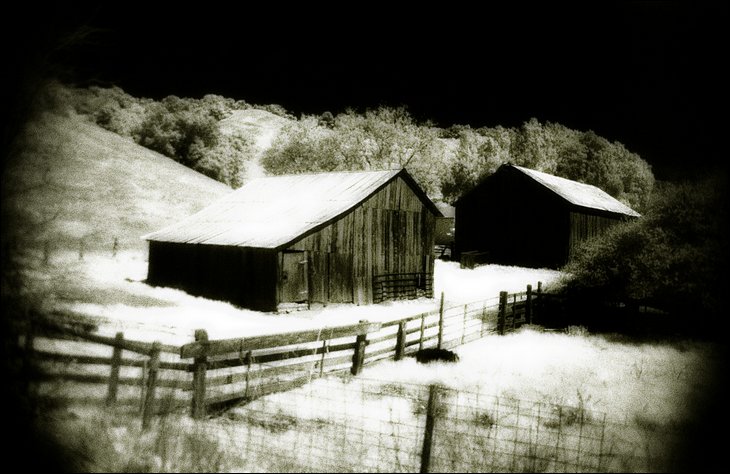
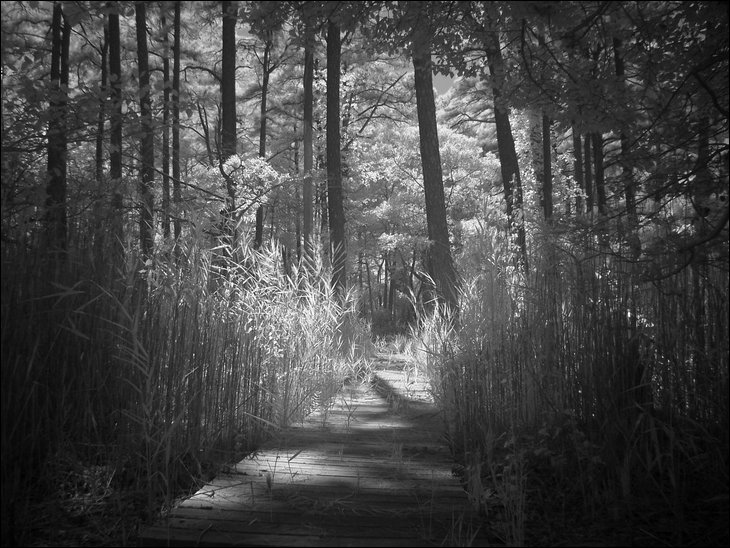
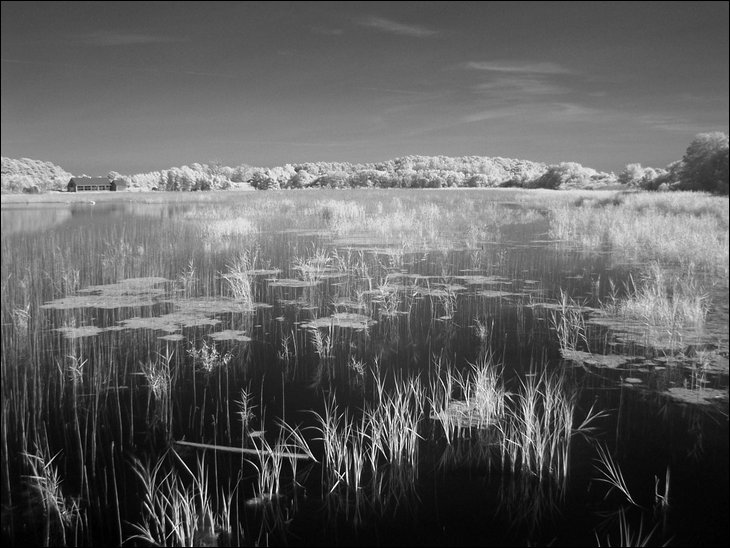
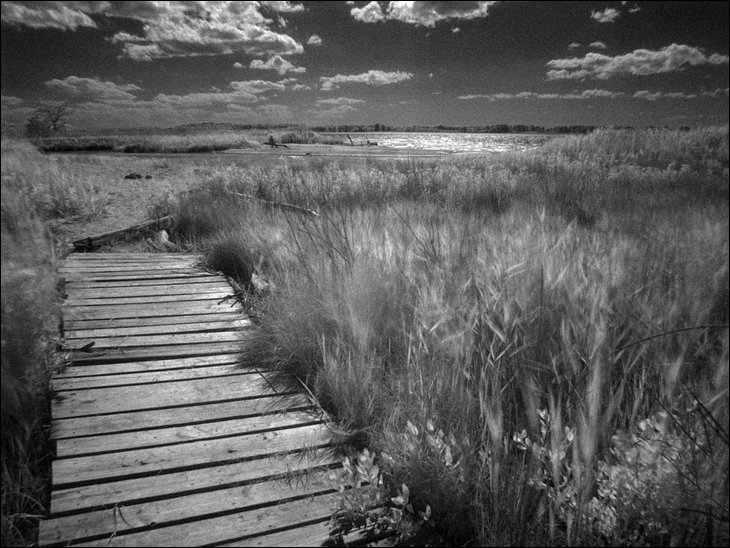
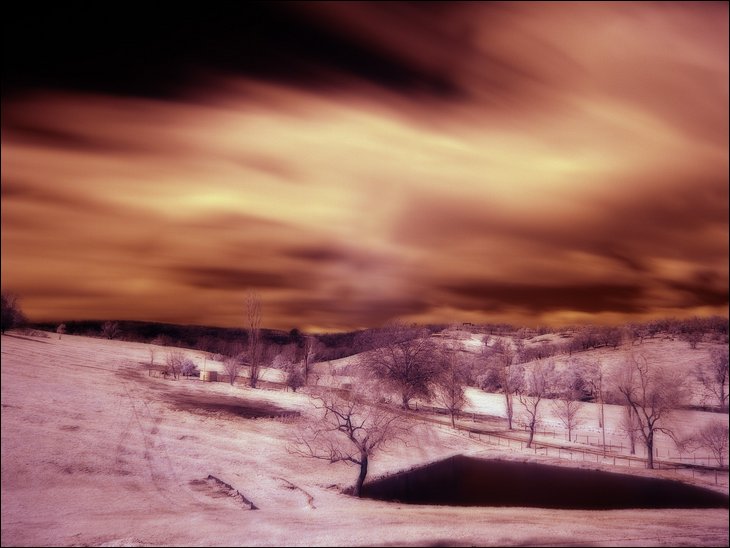
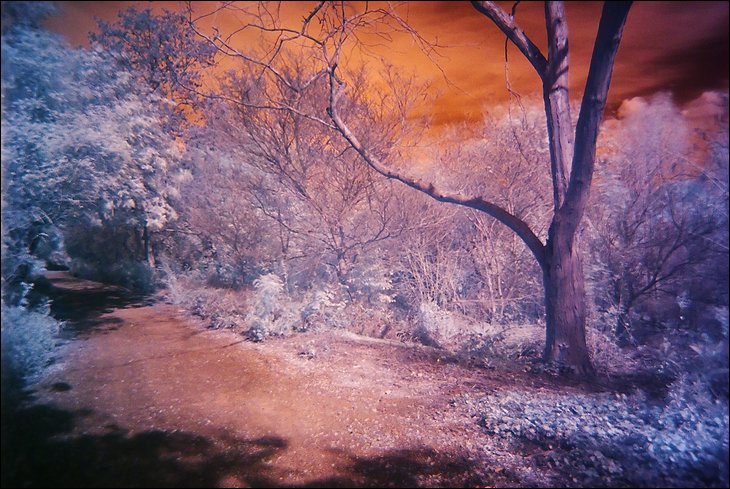
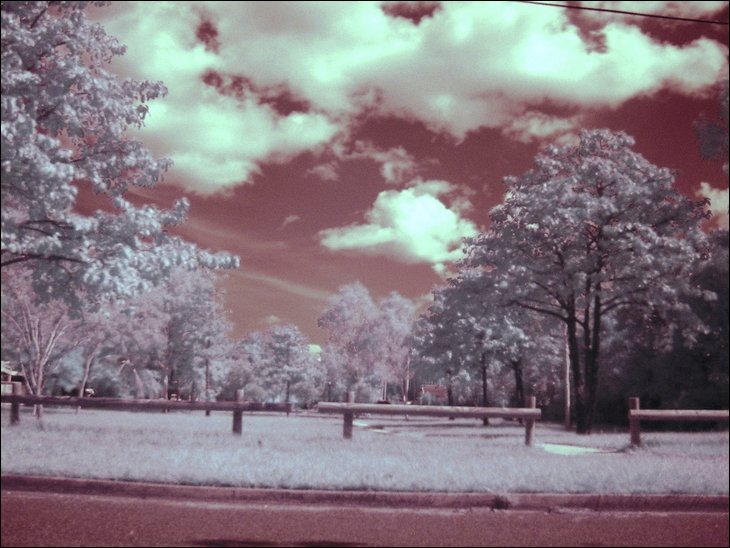
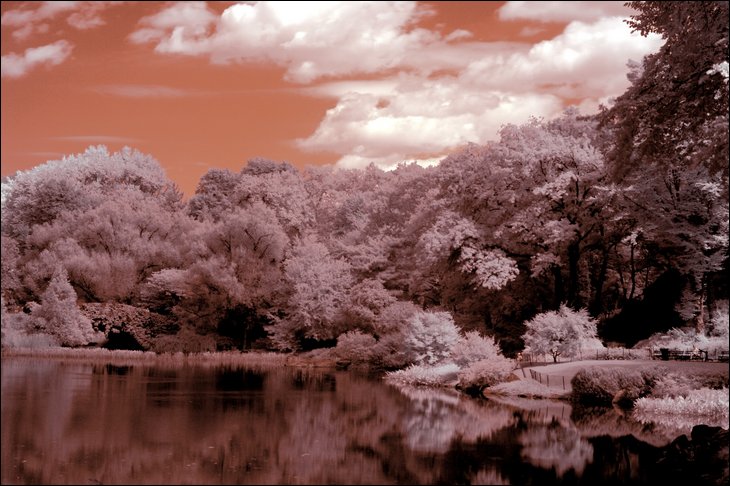
Infrared Photography: The Perfect Way to See Behind the Visible.
Due to the arrival of digital photography, we can take infrared pictures whenever we please, mixing them with “normal” ones, and see results on the spot, tweaking the settings to our hearts’ desires…All depends, of course, on how your camera sensor array reacts to the infrared — and, depending on the filter you are using, to the far red end of the visible spectrum.
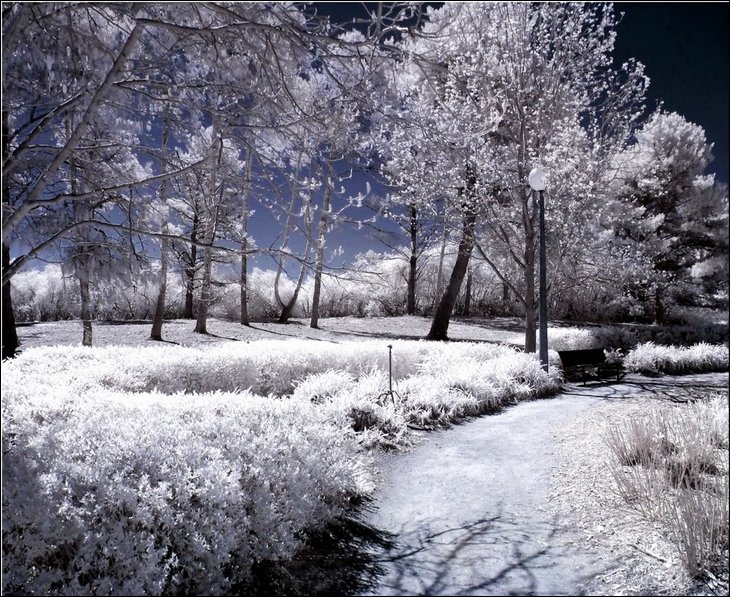
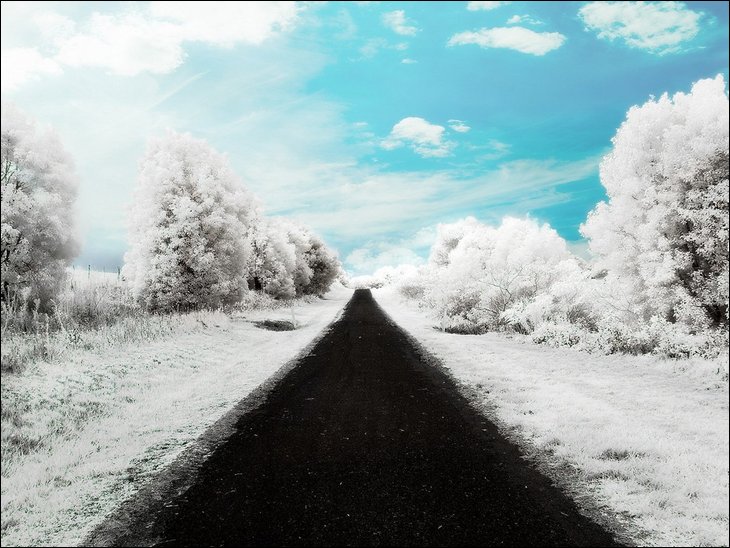
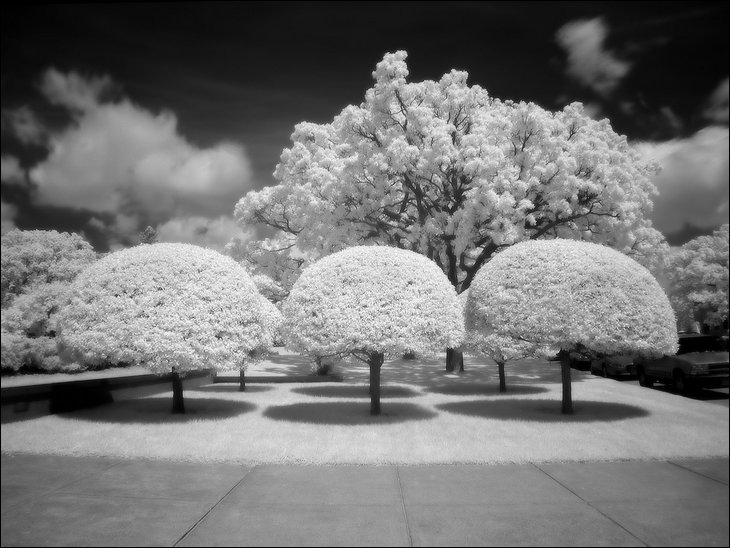
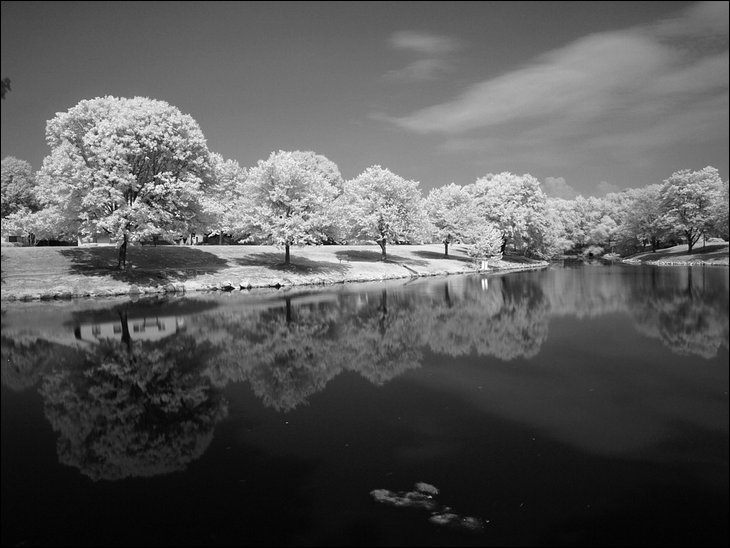
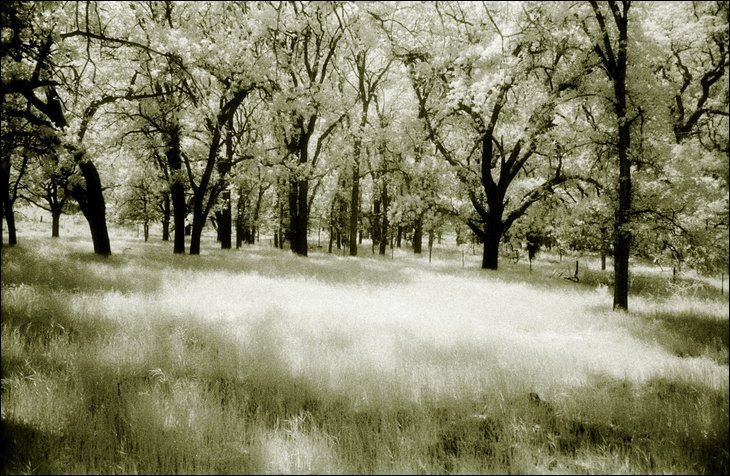
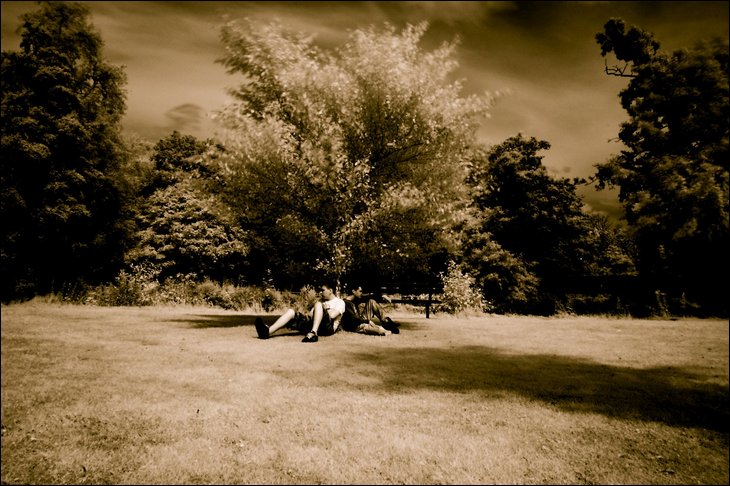
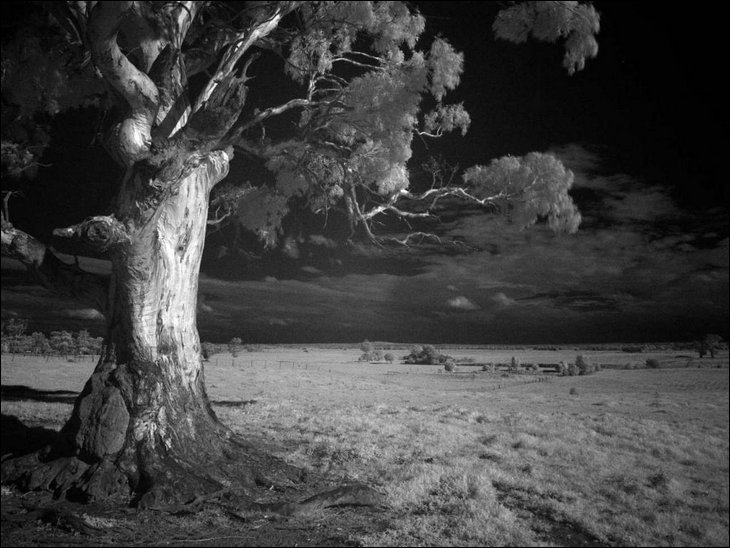
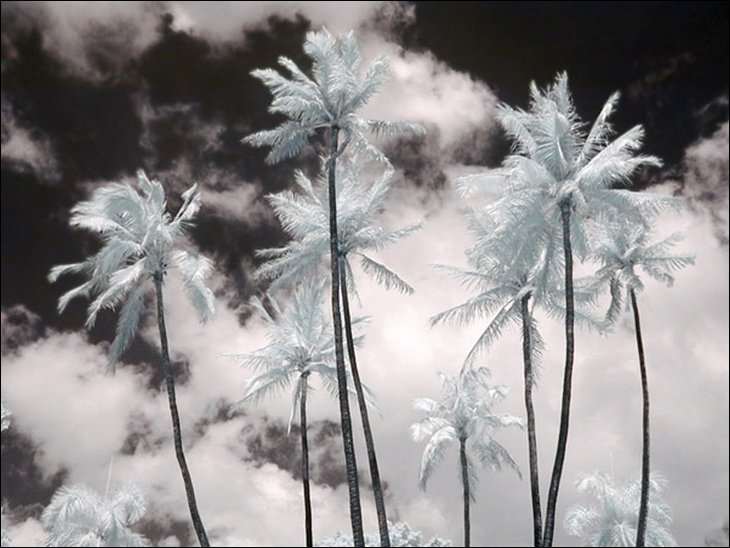
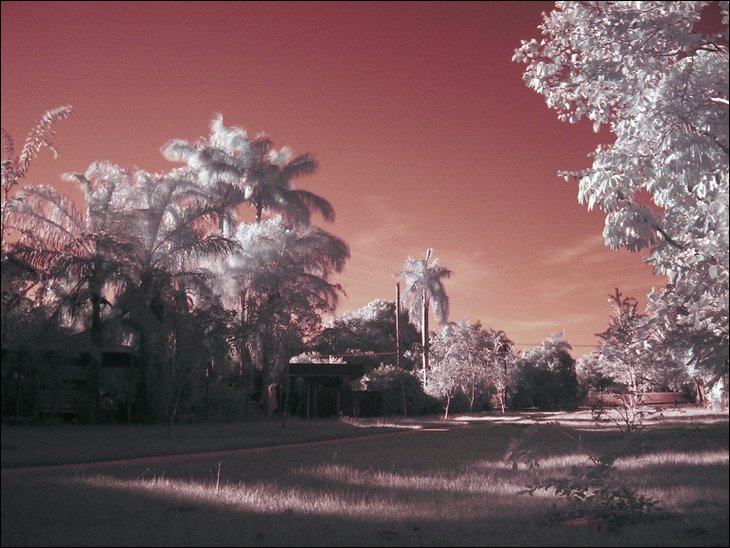
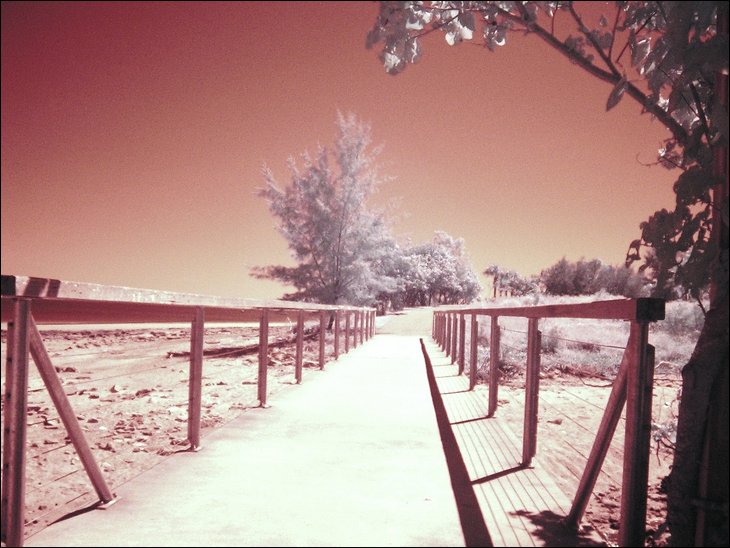
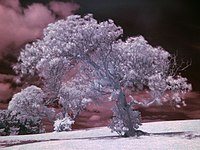
At the first glance, a monochrome picture taken in infrared may look similar to just another black and white photograph. And then you start seeing differences: objects which are bright in visible light (like sky) look dark here, while some of those which are “normally” dark (green foliage) acquire a bright glow. An unusual and eerie feeling.
The most dramatic difference between the visible and infrared spectrum is in case of foliage: it does, indeed, become very bright in infrared. Photographs in infrared show quite unusual tonality, different than that to which we are used, and this may make them esthetically pleasing, at least in many cases. Which, of course, is a matter of taste.
In infrared photography, the film or image sensor used is sensitive to infrared light. The part of the spectrum used is referred to as near-infrared to distinguish it from far-infrared, which is the domain of thermal imaging. Wavelengths used for photography range from about 700 nm to about 900 nm. Usually an “infrared filter” is used; this lets infrared (IR) light pass through to the camera , but blocks all or most of the visible light spectrum (the filter thus looks black or deep red).
When these filters are used together with infrared-sensitive film or sensors, very interesting “in-camera effects” can be obtained; false-color or black-and-white images with a dreamlike or sometimes lurid appearance known as the “Wood Effect,” an effect mainly caused by foliage (such as tree leaves and grass) strongly reflecting in the same way visible light is reflected from snow. There is a small contribution from chlorophyll fluorescence, but this is marginal and is not the real cause of the brightness seen in infrared photographs. The effect is named after the infrared photography pioneer Robert W. Wood, and not after the material wood, which does not strongly reflect infrared.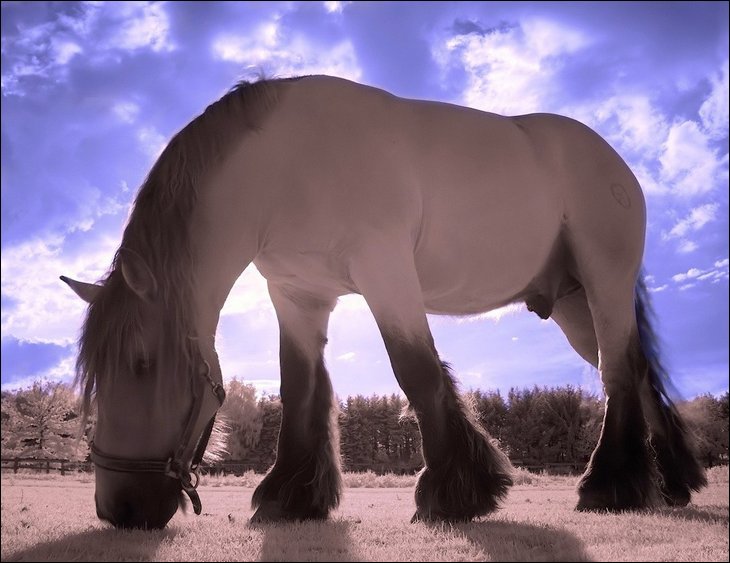


History
Until the early 1900s, infrared photography was not possible because silver halide emulsions are not sensitive to infrared radiation without the addition of a dye to act as a color sensitizer.The first infrared photographs (as distinct from spectrographs) to be published appeared in the October 1910 edition of the Royal Photographic Society Journal to illustrate a paper by Robert W. Wood , who discovered the unusual effects that now bear his name. The RPS is co-ordinating events to celebrate the centenary of this event in 2010. Wood’s photographs were taken on experimental film that required very long exposures; thus, most of his work focused on landscapes. A set of infrared landscapes taken by Wood in Italy in 1911 used plates provided for him by CEK Mees at Wratten & Wainwright. Mees also took a few infrared photographs in Portugal in 1910, which are now in the Kodak archives.Infrared-sensitive photographic plates were developed in the United States during World War I for spectroscopic analysis, and infrared sensitizing dyes were investigated for improved haze penetration in aerial photography.After 1930, new emulsions from Kodak and other manufacturers became useful to infrared astronomy.
Infrared photography became popular with photography enthusiasts in the 1930s when suitable film was introduced commercially. The Times regularly published landscape and aerial photographs taken by their staff photographers using Ilford infrared film. By 1937 33 kinds of infrared film were available from five manufacturers including Agfa, Kodak and Ilford.Infrared movie film also available and was used to create day-for-night effects in motion pictures, a notable example being the pseudo-night aerial sequences in the James Cagney/Bette Davis movie The Bride Came COD.
False-color infrared photography became widely practiced with the introduction of Kodak Ektachrome Infrared Aero Film and Ektachrome Infrared EIR. The first version of this, known as Kodacolor Aero-Reversal-Film, was developed by Clark and others at the Kodak for camouflage detection in the 1940s. The film became more widely available in 35mm form in the 1960s but KODAK AEROCHROME III Infrared Film 1443 is their sole remaining infrared film.
Infrared photography became popular with a number of 1960s recording artists, because of the unusual results; Jimi Hendrix, DOnovan, Frank Zappa and Grateful Dead all issued albums with infrared cover photos. The unexpected colors and effects that infrared film can produce fit well with the psychodelic aesthetic that emerged in the late 1960s.
For some, infrared photography can easily look gimmicky, but many photographers such as Elio Ciol and Martin Reeves have made subtle use of black-and-white infrared-sensitive film. With the advent of digital infrared photography, as a part of full spectrum photography, the technique is gaining popularity and is being sold as fine art photographs in a variety of galleries worldwide.
What to shoot in IR
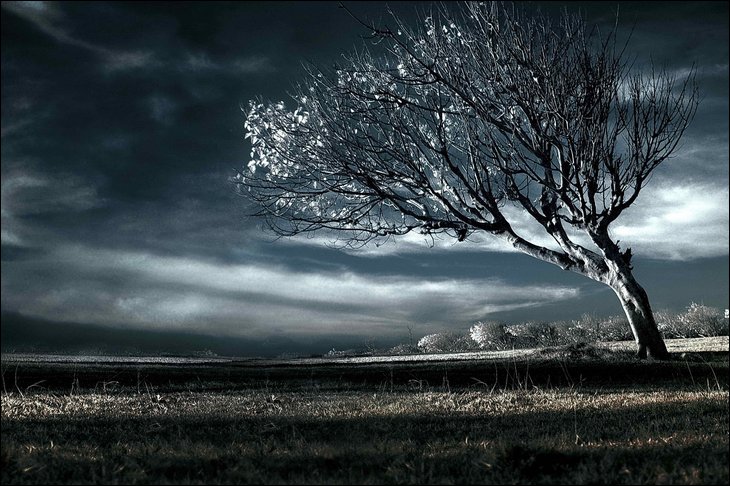
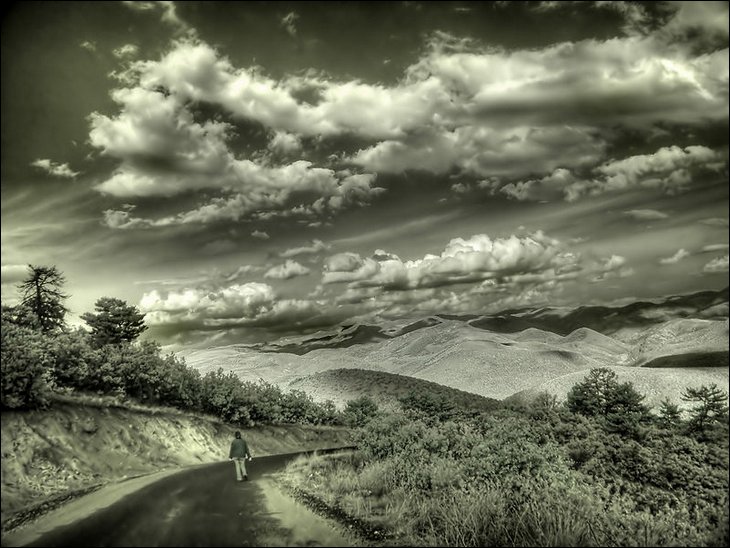
The most rewarding subject to shoot in infrared are sunny outdoors scenes, especially with lots of foliage, grass, and water, preferably with some nice, white clouds in the sky. Morning and evening sunlight is richer in infrared than midday one, so the glowing Woods effect in the foliage will usually be more pronounced. As always in photography, this, however, is not an iron-clad rule. Sometimes an image shot under a cloudy sky may carry a strong visual message as well. For example, I like the one shown in the preceding section. I shot another frame at the same location on a sunny day, and it was, I would say, more trivial.
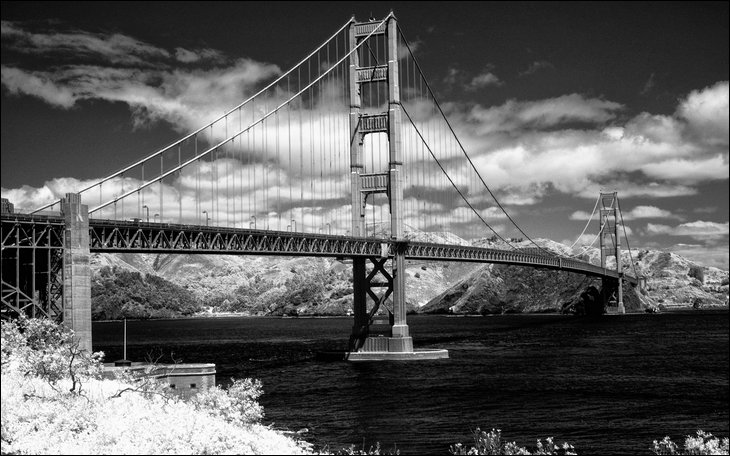
Buildings, especially with bright walls, look really good on the background of the dark, almost-black sky. Some people recommend IR for shooting cemeteries, as the subject goes well with the unreal feel of the medium — but, after all, how many cemetery pictures can you take?
Don’t limit yourself only to the bright greens and dark sky. Even scenes without those telltales of infrared will have a different tonal gradation than a “normal” picture converted to B&W. The eerie atmosphere of IR pictures goes well with adventurous, off-balance composition. Remember the pictures you were taking as an 18-year old, aspiring photographer? Try that again.
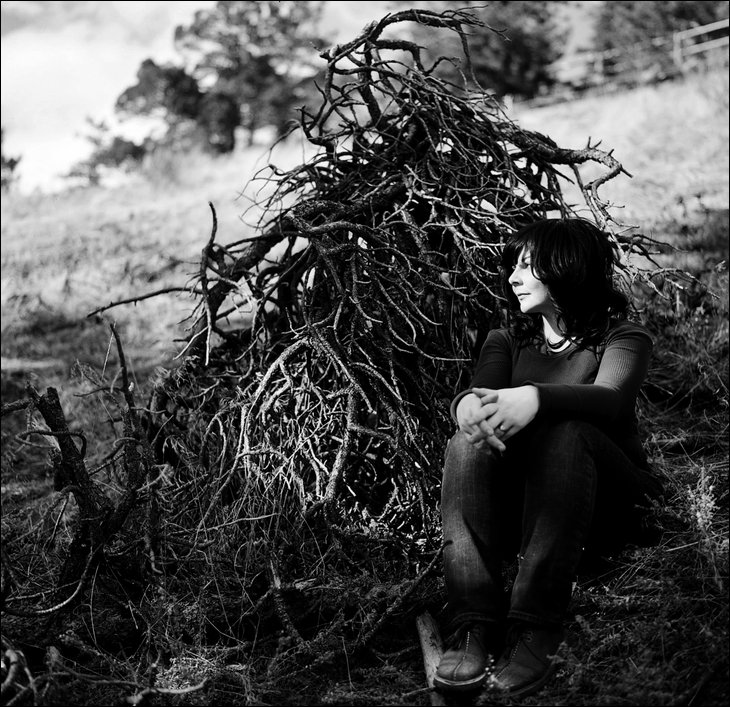
Infrared is not a common medium for people shots, but I have seen some very good IR portraits. Outdoors portraits or nudes with the surrealist background may have a strong impact. The skin becomes more white, with most imperfections (and texture) gone, which may be related to the partial transparency of its outer layers to the longer wavelengths, and the porcelain-like tonality can be quite interesting.


Buildings, especially with bright walls, look really good on the background of the dark, almost-black sky. Some people recommend IR for shooting cemeteries, as the subject goes well with the unreal feel of the medium — but, after all, how many cemetery pictures can you take?
Don’t limit yourself only to the bright greens and dark sky. Even scenes without those telltales of infrared will have a different tonal gradation than a “normal” picture converted to B&W. The eerie atmosphere of IR pictures goes well with adventurous, off-balance composition. Remember the pictures you were taking as an 18-year old, aspiring photographer? Try that again.
Infrared is not a common medium for people shots, but I have seen some very good IR portraits. Outdoors portraits or nudes with the surrealist background may have a strong impact. The skin becomes more white, with most imperfections (and texture) gone, which may be related to the partial transparency of its outer layers to the longer wavelengths, and the porcelain-like tonality can be quite interesting.
For more Information and image sources
click the numbers: 1 2 3 4
Feature via Fun Guerilla
To add your comments, click on
links to this post
here or below. It will take you to a stand-alone copy of this page. There, you will find the comments box, so feel free to let 'er rip.
If you like what you see here - tell me - and tell your friends!
Spooooky Reading...


No comments:
Post a Comment